Defining a Portal Structure
Each portal is a conglomerate of various parts that you can use to make your portal a comprehensive representation of your data narrative. For example, you can add pages and workbooks to your portal to showcase data. You can create sections and sub-sections to better organize your content. The structure of a portal can be as simple or as complex as required by your specific purpose. There are four content types that you can add to a portal:
- Folder
- Workbook
- Page
- Shortcut to a page or workbook
You can use these elements to define a portal structure by building a simple folder hierarchy.
Procedure: How to Define a Portal Structure Using Content
- Create a portal as described in Creating Portals.
- On the Home Page, in the Resources tree, select the portal you want to modify.
- Using the actions bar, add content to create a portal navigation layout of your choice.
You can create pages, workbooks, and folders to populate your portal. You can also use the Shortcut feature to link existing standalone pages to your portal.
The images below show an example of the initial view of the portal that consists of pages and folders.
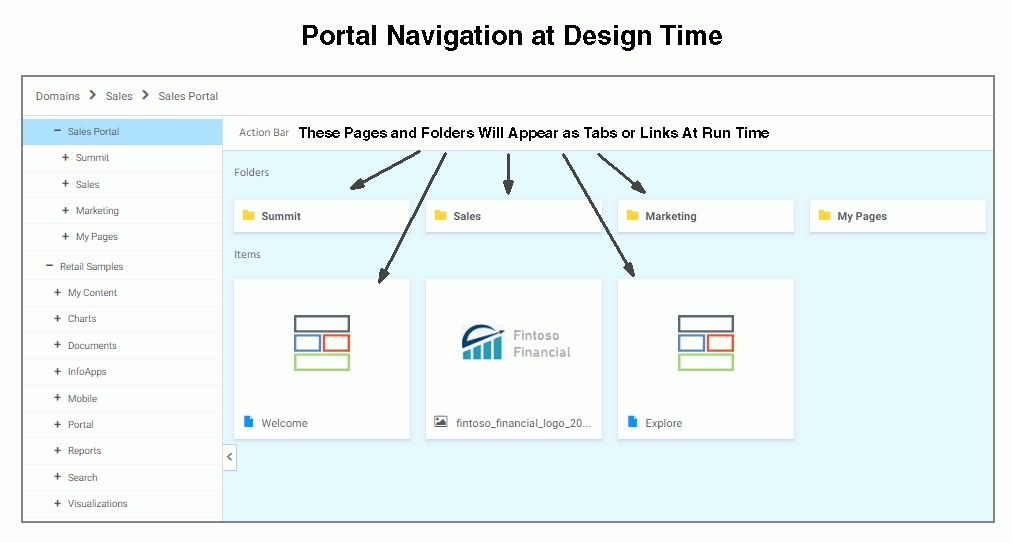

When tabs or links overflow beyond the width of a page, an ellipsis icon displays allowing you to access the entire list of tabs or links, as shown in the following image.

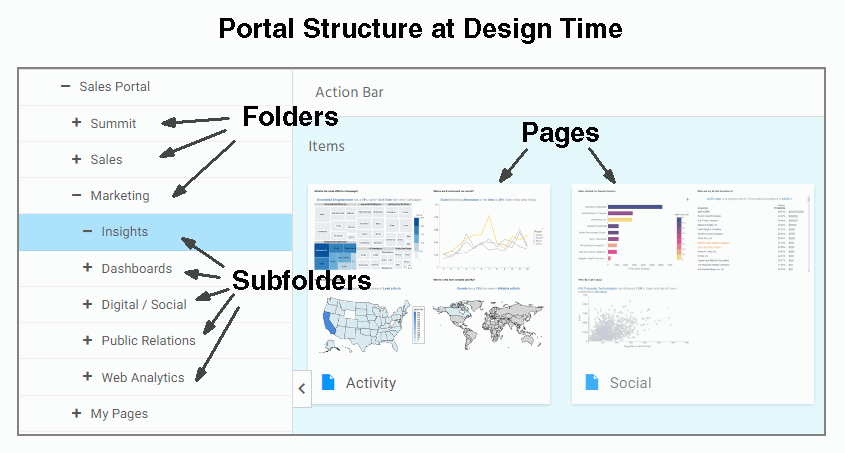
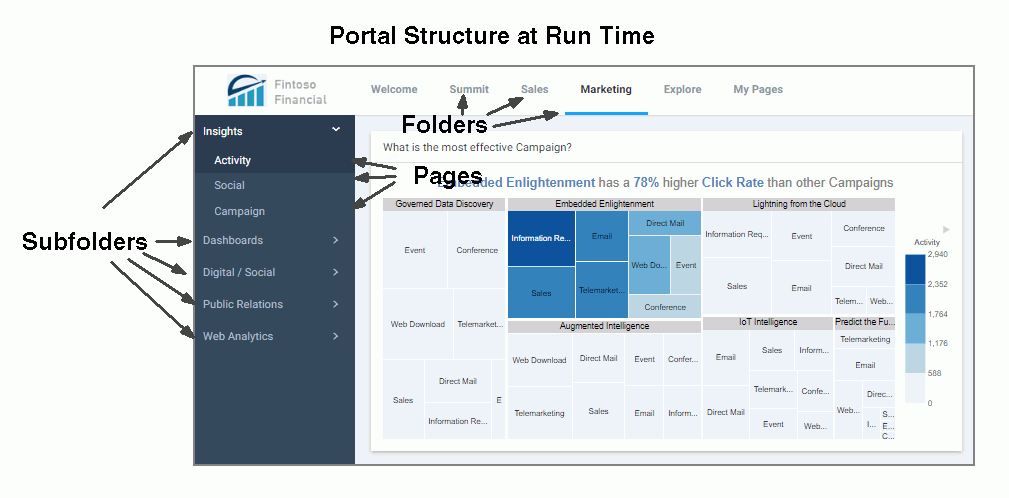
- Optionally, add more folders, subfolders, and pages to your portal.
The images below show an example of how folders, subfolders, and pages make up the structure of a portal.
- Once your portal is complete, you can publish it and make it available to other users.
Procedure: How to Use Shortcuts to Add Pages to a Portal
- On the Home Page, select a portal you want to modify.
- Navigate to the level inside the portal where you want to add a page.
- From the actions bar, click Shortcut.
The Select dialog box opens.
- Using the breadcrumb trail, navigate to the page you want to add to your portal and click it.
Notice that the Title and Name fields are inactive, as shown in the following image.
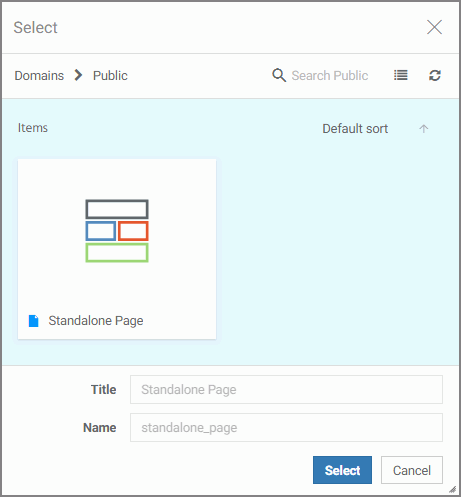
- Click Select.
The page displays inside the portal structure with the Shortcut icon added to its page icon.
- To change the page title, right-click the page, click Properties, edit the Title field in the Properties panel, and then click Save.
The new page title displays.
- Release: 8206
- Category: Building Portals
- Product: Business Intelligence Portal
- Tags: How-to's