Navigating Get Data With Keyboard Controls
You can use keyboard commands to navigate through the initial Get Data page, so that all options can be performed from the keyboard without requiring a mouse, using a combination of the Tab key, Shift+Tab key, and arrow key actions. Pressing the Enter key performs the primary action of the selected element. Pressing the Esc key closes a panel.
You can jump to areas of the page that are not near each other by pressing the key combination Shift+Ctrl+F10. This opens an accessible context menu, as shown in the following image.
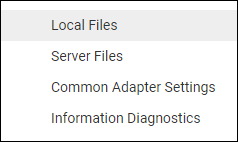
You can scroll through the context menu using the Up arrow and Down arrow keys. Press the Enter key to jump to the selected area. Upload Data takes you to the first tile in the LOCAL FILES area. Connect to Data takes you to the first tile in the SERVER FILES area.
Procedure: How to Navigate Get Data

The Tab key can be used to navigate forward, and the Shift+Tab key combination can be used to navigate backward, to the following areas of the page.
-
Close dialog X icon.
-
First tile in the LOCAL FILES section.
-
Refresh icon in the SERVER FILES section header.
-
Search in the SERVER FILES section header.
-
Close X icon in the search bar.
-
First tile in the SERVER FILES section.
Use the arrow keys (up, down, left, and right) to navigate within the server files tiles.
Press the Enter key or Spacebar to open an accessible context menu for that tile.
Press the Tab key to navigate the context menu items, which can include Change Settings, Remove, Help, and Prerequisites icons.
Press the Tab key to navigate to the following areas of an open Change Settings panel.
- Save settings in dropdown.
- Select dropdown.
- First accordion.
- First help icon within accordion.
- First field within accordion.
- Reset to defaults button.
- Cancel button.
- Save button.
-
Common Adapter Settings link.
-
Information & Diagnostics link.
-
Cancel button.
-
Select button.
- Release: 8207
- Category: Connecting to Data
- Tags: How-to's