Sharing Content in WebFOCUS
Each workspace in the repository comes with the private My Content folder. Whenever you create content inside the My Content folder, it automatically displays in the My Workspace view. This content remains private and only visible to you, unless you share it with other users and groups. You can share content in one of two ways:
- Share with all users. This method makes the content available to all users that have access to the workspace.
- Share with specific users and groups. This method allows you to choose which users and groups are able to access to your private content.
In both scenarios, you can revoke access to your content by right-clicking it and clicking Unshare.
Procedure: How to Share Content With All Users
- Navigate to a private content item in one of the following ways.
- In the Resources tree, navigate to a workspace of your choice and open the My Content folder.
- Open the My Workspace view of the Home Page.
- Right-click the item that you want to share, and then click Share.
When viewing the item inside the My Content folder, notice that the Share icon now displays next the default icon, as shown in the following image.
The item is now shared with all users that have access to this workspace.
- To unshare the item, right-click it, and then select Unshare.
Procedure: How to Share Content With Specific Users and Groups
- Navigate to a private content item in one of the following ways.
- In the Resources tree, navigate to a workspace of your choice and open the My Content folder.
- Open the My Workspace view of the Home Page.
- Right-click the item that you want to share, and then select Share with.
The Share with Others dialog box opens.
Note: If your sharing privilege does not allow you to open the Share with Others dialog box, you can share or unshare your item by clicking the Share option. In this case, the item is shared with every user that has access to the workspace in which the item resides.
- In the Search field, type the name of the user or group with which you want to share this item.
- Click the correct entity from the drop-down list, as shown in the following image.

The name now displays below the Search field. The item is shared.
- Optionally, add more users or groups.
You can narrow your search by clicking an arrow and selecting Users or Groups, as shown in the following image.
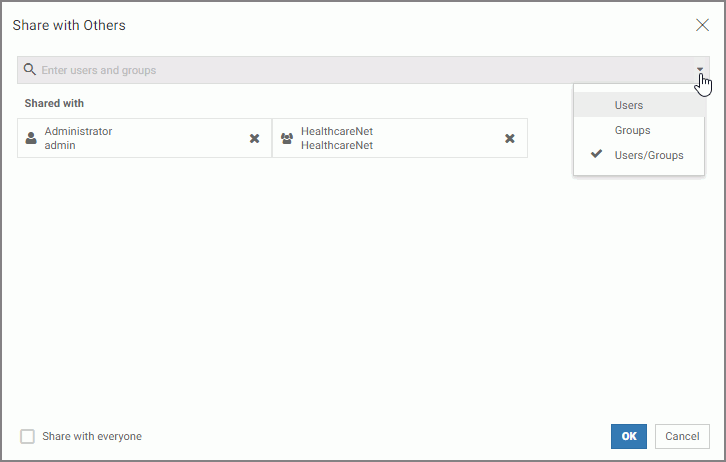
Note: You can also share the item with all users by selecting the Share with everyone checkbox.
- Once you have selected your options, click OK.
The icon now indicates that the item is shared. You can unshare it at any time or go back to the Share with others dialog box and edit your choices.
- Release: 8207
- Category: Using the WebFOCUS Home Page
- Product: WebFOCUS Home Page