Using the Get Data Advanced Mode
For the most common data access requirements, the Simple Mode for Get Data should be all that you need. The Advanced Mode has additional capabilities for more complex data scenarios.
In Advanced Mode, when uploading or connecting to data, you can classify fields into dimension hierarchies and measure groups, create new virtual fields and filters, and profile data. When uploading data, you can join table files, and specify load options, applications, and how to derive key fields. When connecting to data, you can select tables as facts or dimensions to create a cluster join. For more information, see the Server Administration technical content.
Accessing Data in the Advanced Mode
Depending on your version of WebFOCUS and your permissions, you may be able to access data using the Advanced Mode.
Procedure: How to Access Data Using the Advanced Mode
- On the WebFOCUS start page, click the plus menu, and then click Get Data (Advanced), or, on the WebFOCUS Home Page, click the plus menu, click the Prepare and Manage Data icon, click the Get Data button, and then click the Advanced Mode link.
The advanced mode Get Data Data dialog box opens, as shown in the following image.
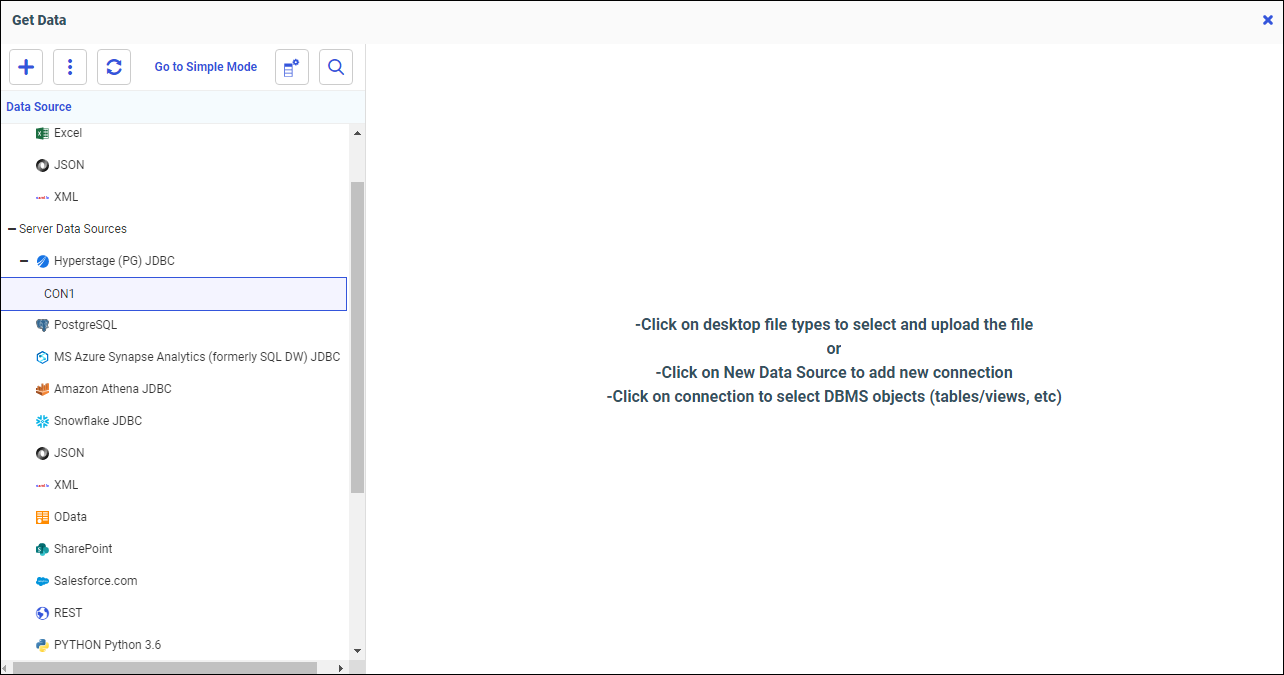
You can now:
- Double-click the Desktop File type to select and upload your file.
- Right-click a Server Data Source and select Add Connection to add a new connection.
- Right-click a connection and select Show DBMS Objects to create base or cluster synonyms.
- Click Go to Simple Mode to return to the simple mode Get Data dialog box.
Uploading Data Files
Procedure: How to Upload Data Files
From the Get Data dialog box, under Desktop files, you can upload, append, or merge delimited, Excel, JSON, or XML files to a target environment. An Excel file can contain a single worksheet or multiple worksheets. Delimited, JSON, and XML files are individual data sources.
- From the Get Data dialog box, click one of the following desktop file types: Delimited Files, Excel, JSON, or XML.
Your operating system Open dialog box displays.
- Select the file that you want to upload, and then click Open.
Your data opens in the Uploading Data page. A single worksheet Excel file is shown in the following image.
Your data is loaded into temporary storage and the first few records from the file are shown. A default Business View is created and shown. There are many options for reviewing and modifying your data before you upload it to the target environment. For more information, see the Server Administration technical content.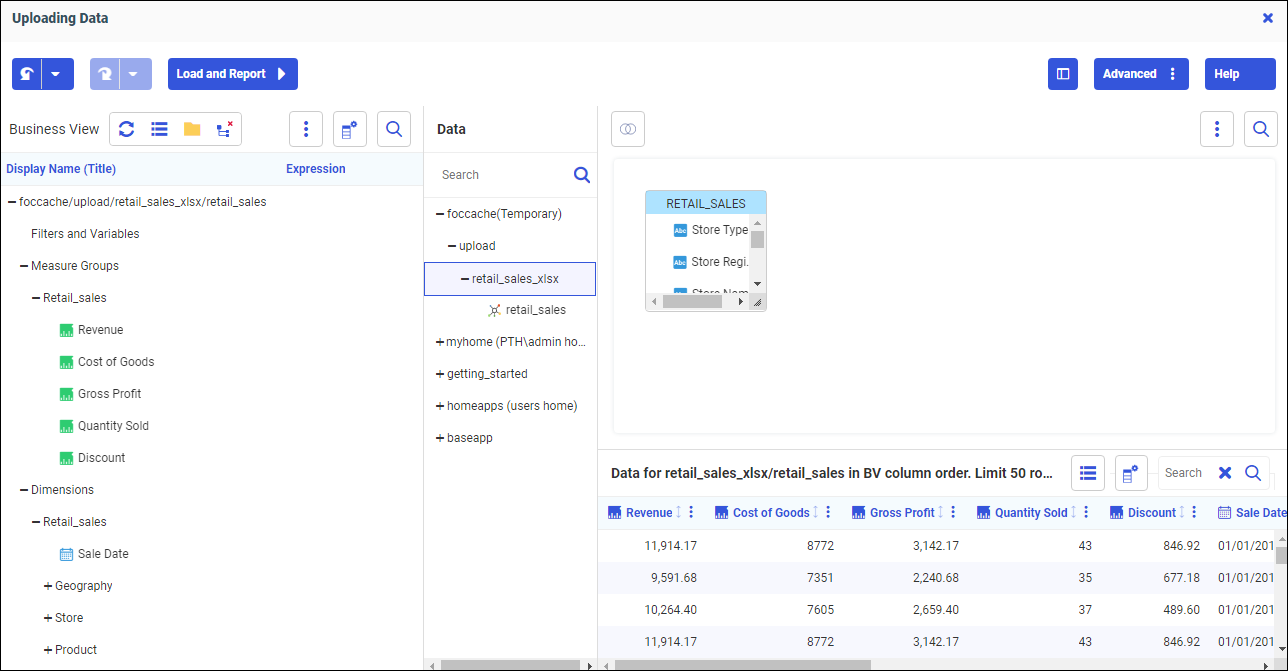
Note: By default data values are shown for single-sheet Excel and other file types. If uploading an Excel file with multiple-worksheets, you can select the worksheet for default preparation by dragging it from the Data panel to the canvas.
When uploading a file, a default Business View is automatically created. Numeric fields are categorized as Measures, based on numeric data types, or as Dimensions, based on non-numeric data types. You can right-click fields to change roles, create filters and expressions, pivot, or profile data, among other options, as shown in the following image.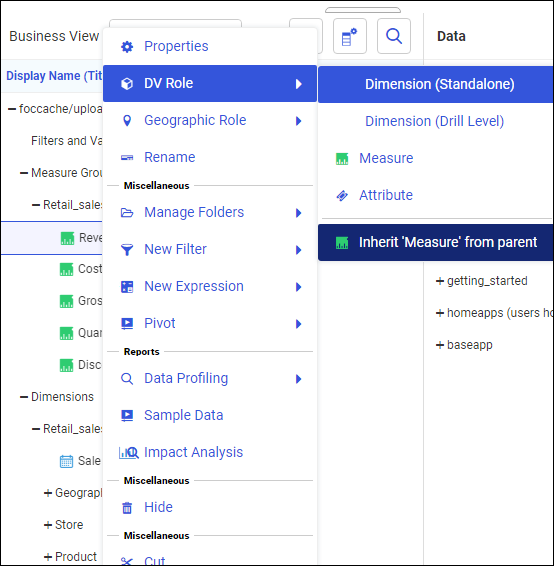
In the sample data panel, you can work in an Excel-like mode. The options in each column drop-down menu are the same as the right-click options in the Business View.
On the canvas, you can drag and drop synonyms from the Data panel onto the canvas to create a Join, change Join options, and insert a child or root. When uploading a workbook containing multiple worksheets, you can join the worksheets into a single table when uploading. You can also join tables for which metadata already exists on the server. For more information, see the Server Administration technical content.
- If you are satisfied with your data, click the Load and Report button on the ribbon.
The Load Options dialog box displays.
The Apply Filters check box is selected by default. If you have created filters, they will be applied automatically to the load process. If you do not want filters applied automatically, but do want them applied to your created metadata, clear the Apply Filters check box.Note: Clicking Prepare Data proceeds to load the data and opens a Data Flow with the table selected, so you can perform additional data preparation actions on it.
For more information, see the Server Administration technical content.
- If the load parameters are correct, click Proceed to Load.
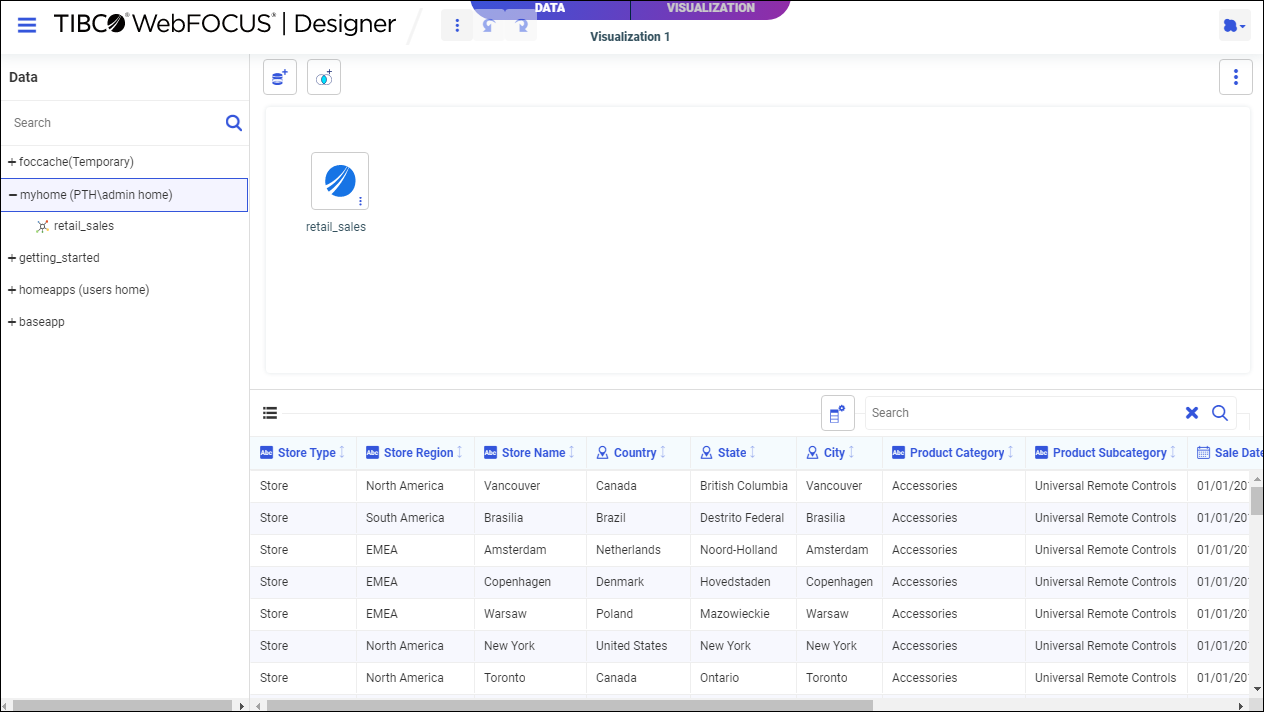
Your file loads and displays in WebFOCUS Designer, as shown in the following image.
You can click the Data tab, as shown in the following image, to further profile and enhance your data.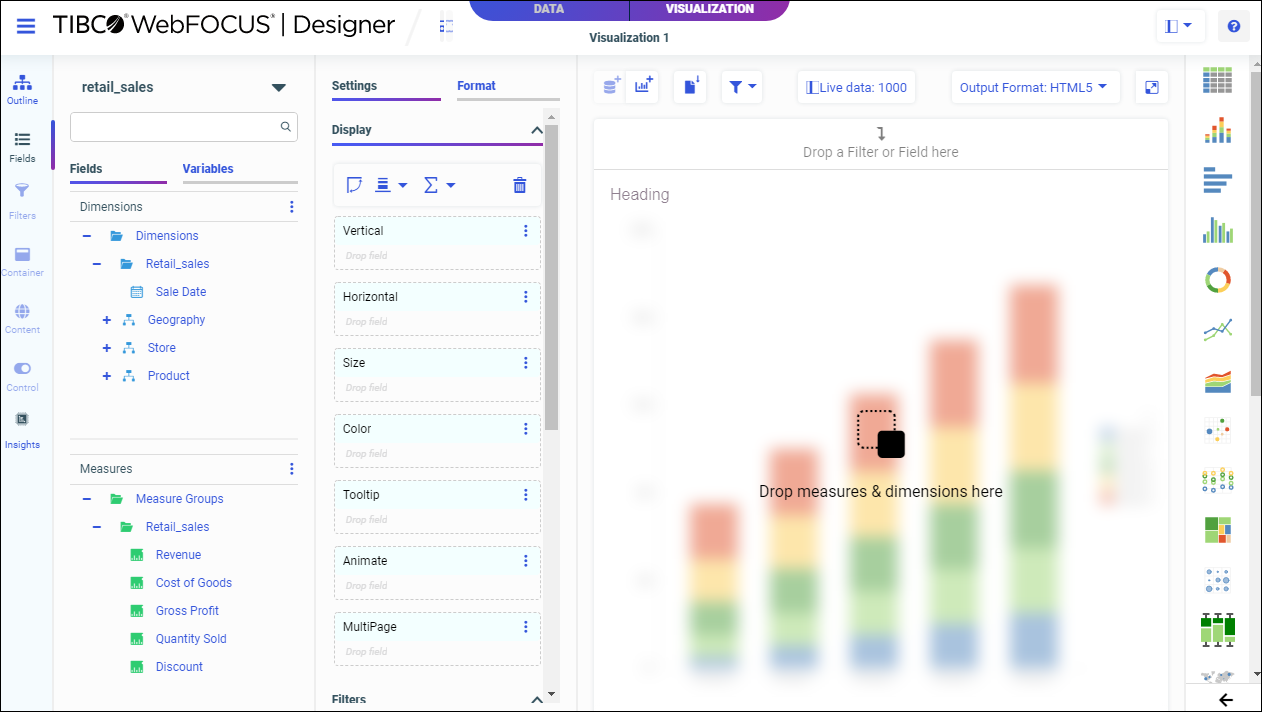
Procedure: How to Append New Data to an Existing Synonym
- After uploading a file, from the Uploading Data page, click the Advanced button and then click Load Options from the drop-down menu.
The Load Options dialog box opens.
- From the Load Option drop-down menu, click Append to Existing.
The Select Target Synonym dialog box opens.
- In the Select Target Synonym dialog box, select the synonym to which you want to append your data.
- Click OK.
The Load Options dialog box opens.
- Click OK.
The Merge Editor dialog box opens, where you can make additional changes to how your data is appended, for each column in the spreadsheet.
- Create at least one Insert expression in the Merge Editor dialog box.
- Click OK.
Your data is displayed in the Uploading Data page.
- If you are satisfied with how your data is displayed, click the Load and Report button on the ribbon.
Your file is loaded and displays in WebFOCUS Designer.
Procedure: How to Merge New Data With an Existing Synonym
- After uploading a file, from the Uploading Data page, click the Advanced button and then click Load Options from the drop-down menu.
The Load Options dialog box opens.
- From the Load Option drop-down menu, click Merge into Existing.
The Select Target Synonym dialog box opens.
- In the Select Target Synonym dialog box, select the synonym to which you want to merge your data.
- Click OK.
The Target Load Options dialog box opens.
- From the If the record exists drop-down list, click the action you want to occur when a record in the new spreadsheet matches a record in the existing data. You can choose to reject the matching record, update the existing record, or delete the existing record. By default, Update the existing record is selected.
- From the If the record does not exist drop-down list, click the action you want to occur when a record in the new spreadsheet does not match the record in the existing data. You can choose to include or reject the record that does not match the existing record.
- Click OK.
The Merge Editor dialog box opens, where you can make additional changes to how your data is merged, for each column in the spreadsheet.
- Create at least one Matching expression in the Merge Editor dialog box.
- Click OK.
Your data is displayed in the Uploading Data page.
- If you are satisfied with how your data is displayed, click the Load and Report button on the ribbon.
Your file is loaded and displays in WebFOCUS Designer.
Connecting to Data Sources
From the Get Data dialog box, under Server Datasources, you can connect to various data sources and create synonyms and cluster business views. You can also configure new adapters, add, remove, or change connections to existing adapters, and view and edit properties.
Procedure: How to Create Synonyms
When you connect to data, you can create base or cluster synonyms. A cluster synonym is made up of multiple base synonyms connected by Joins.
- From the Get Data dialog box, under Server Datasources, right-click a configured adapter.
A shortcut menu opens.Note: Menu options may differ for different categories of adapters.
- Click Show DBMS objects from the shortcut menu.
The Create Synonym dialog box opens. - Select the object type and enter the owner/schema and database from which to generate the list of objects for selection, as shown in the following image.
You can use the object name box and Filter button to list specific object names based on the criteria you entered. The object name can include wildcards. These filter options are available depending on database support.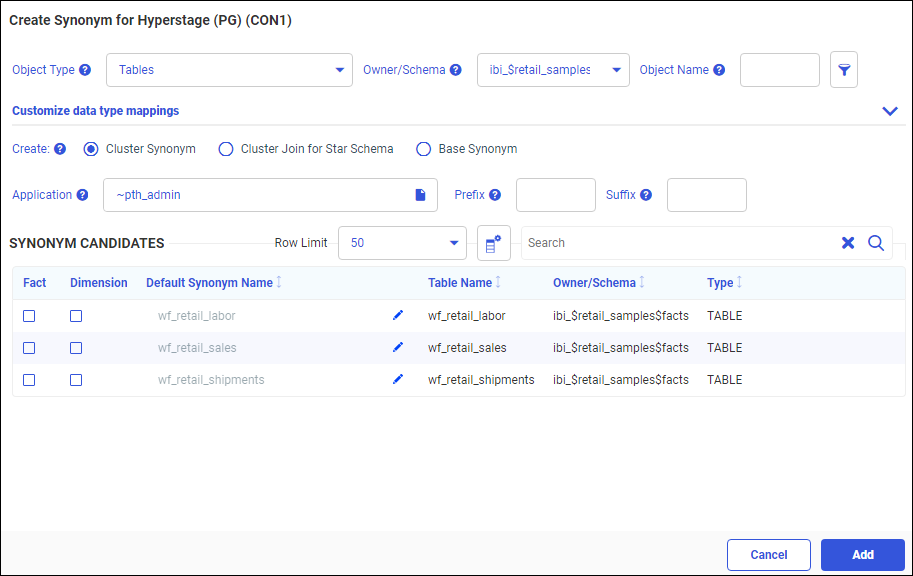
- Select the synonym type to be created. Steps for creating different synonym types are below.
Procedure: How to Create a Cluster Synonym
- From the Create Synonym dialog box, select the Cluster Synonym radio button. This is the default setting. A cluster synonym is made up of multiple base synonyms connected by Joins.
Available table cluster synonym candidates display.
- Select one or more tables as Facts, as shown in the following image.
You can change the name of any selection in the Default Synonym Name field.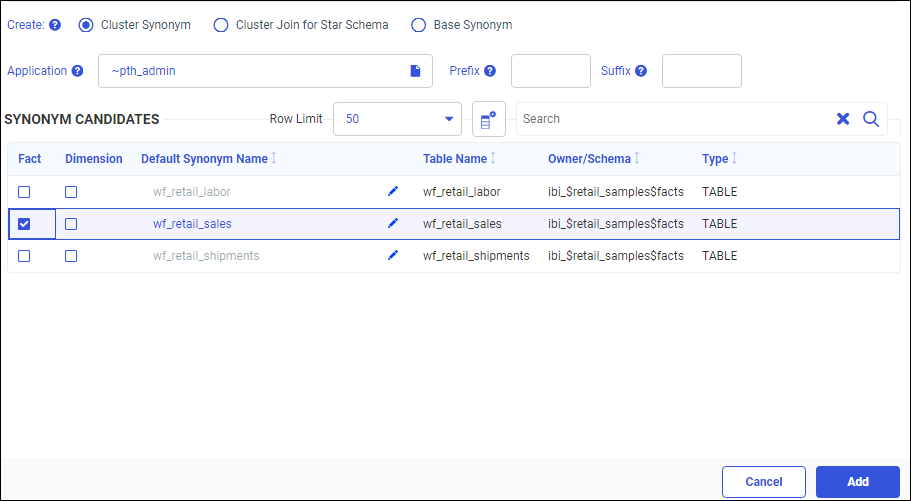
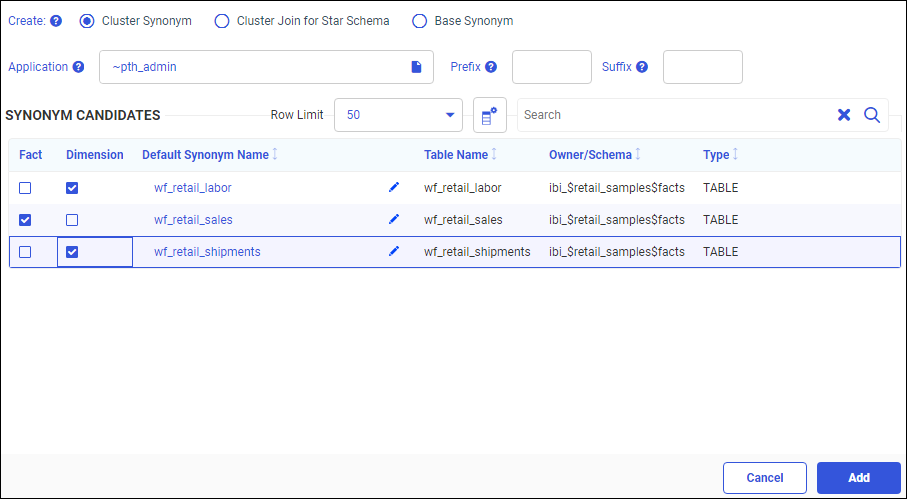
- Select Dimension tables. You can either check the checkboxes, or to display related Dimensions, right-click the selected object name, and select Show Related Dimensions.
To add related Dimensions, right-click the selected object name, and select Add Related Dimensions.
Note: Show and Add Related Dimensions options are only available for Relational data sources if Foreign Key to Primary key information is available in the RDBMS.
- Click the Add button.
Your cluster synonym displays, as shown in the following image.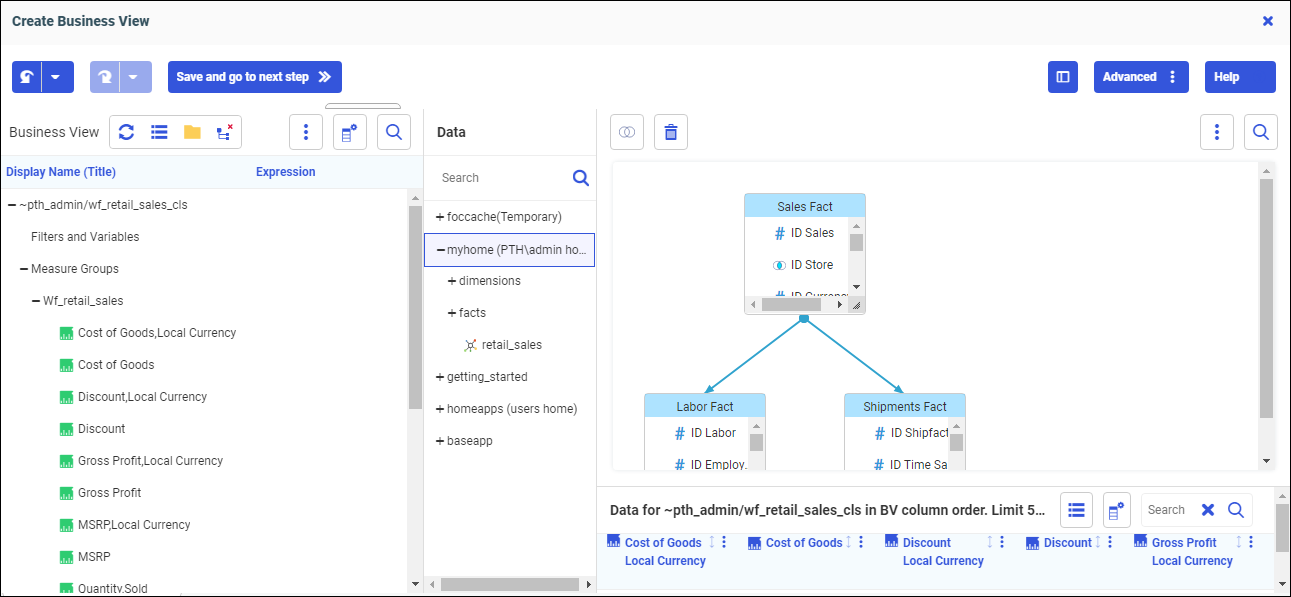
- Enhance your synonym as needed.
- Click Save and go to the next step on the ribbon to proceed.
The Save As dialog box displays, as shown in the following image.
You can select the synonym target application from the tree or change the synonym name in the Selection field.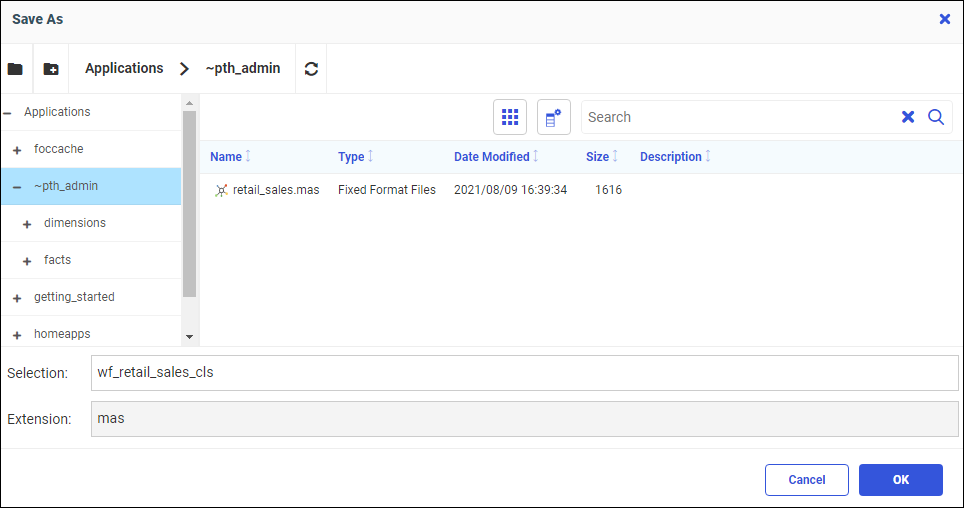
- Click OK.
Your cluster synonym is saved to the target specified.
Procedure: How to Create a Base Synonym
- From the Create Synonym dialog box, select the Base Synonym radio button.
Available base synonym candidates display.
- Select a table for base synonym creation, as shown in the following image.
You can change the name of any selection in the Default Synonym Name field.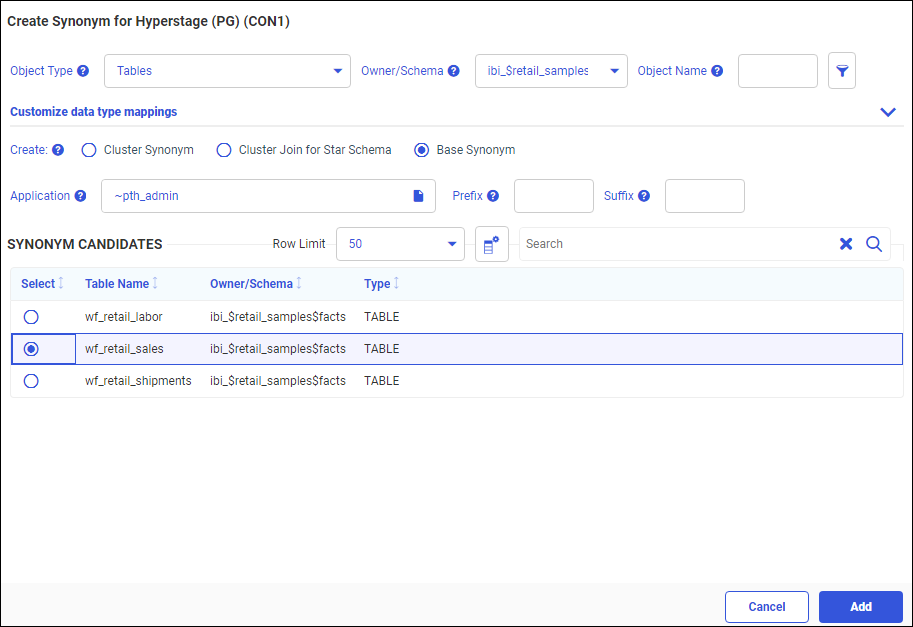
- Click the Add button.
Your base synonym displays, as shown in the following image.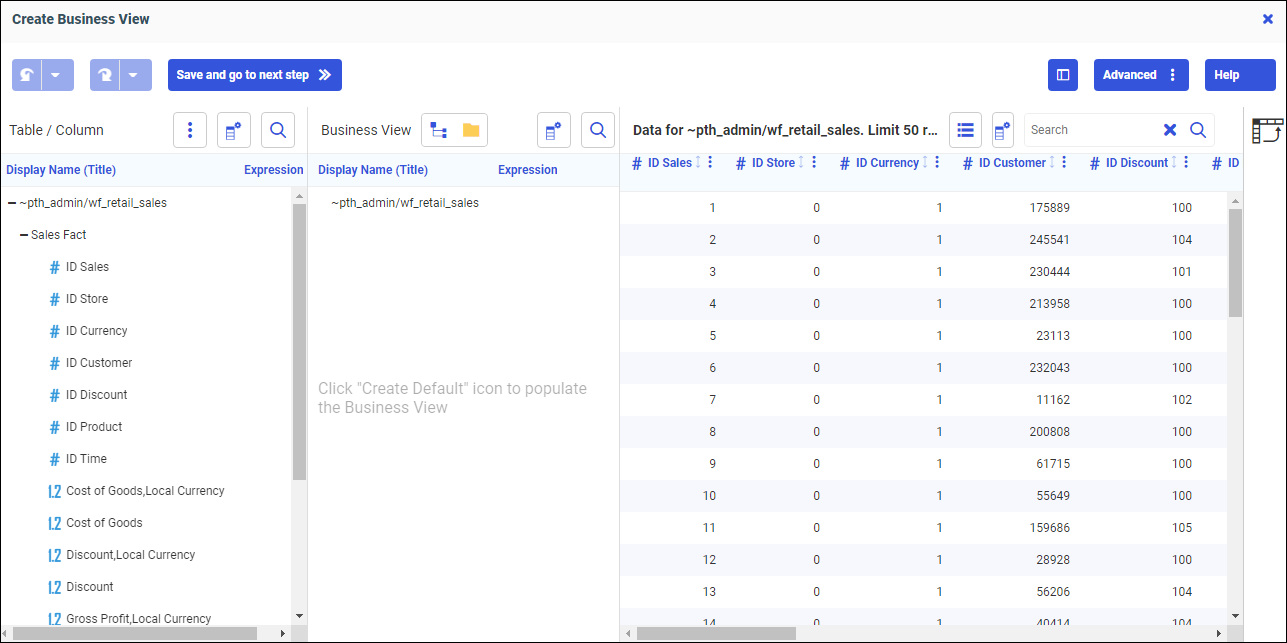
- Enhance your base synonym as needed.
- Click Save and go to the next step on the ribbon to proceed.
The Save As dialog box displays, as shown in the following image.
You can select the synonym target application from the tree or change the synonym name in the Selection field.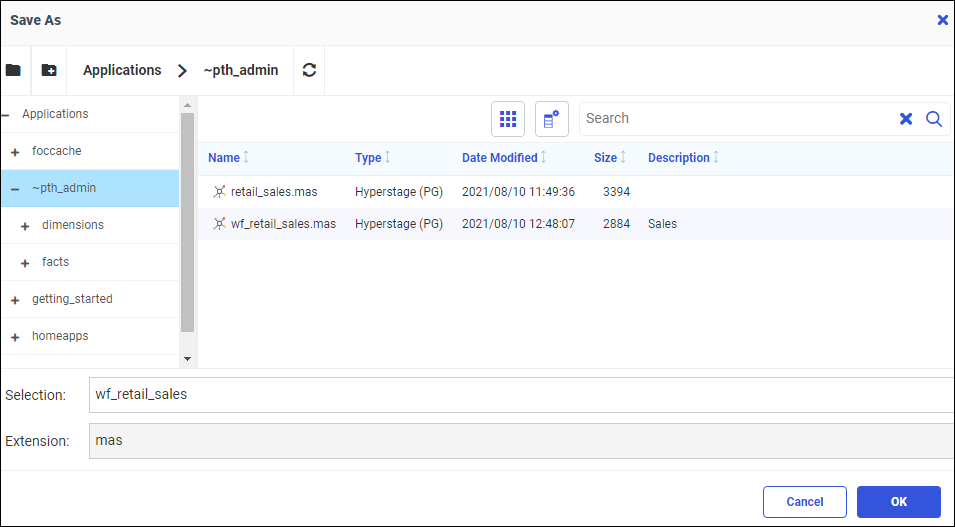
- Click OK.
Your base synonym is saved to the target specified.
Configuring Data Sources
From the Get Data dialog box, under Server Datasources, you can configure new adapters, add, remove, or change connections to existing adapters, and view and edit properties.
Procedure: How to Configure a New Adapter
- From the Get Data dialog box, click the Configure New Data Source button
 .
.
An Available adapter dialog box opens, as shown in the following image.
You can select a category of adapter to display from a categorical drop-down list. A search option is also available.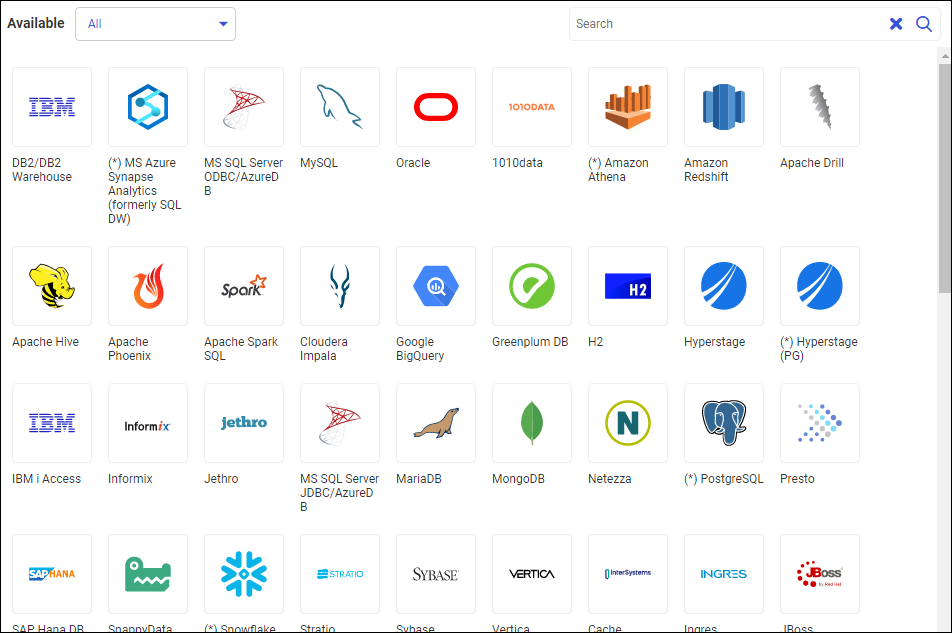
- Right-click an adapter and click Configure.
Note: If the adapter has multiple versions, right-click the adapter and select which version to configure.
A Configuration dialog box opens. Note: Click Prerequisites to display any requirements that software be installed and configured on your WebFOCUS Server before you can use the selected adapter.
- Enter the adapter parameters.
See the information specific for your adapter in the Adapter Administration technical content.
- Click Test, if available, to test your configuration.
- Click Configure.
The configured adapter appears under Server Datasources in the Get Data dialog box.
Procedure: How to Add a Connection
- From the Get Data dialog box, under Server Datasources, right-click a configured adapter.
A shortcut menu opens.
Note: These menu options are for a SQL adapter. Options may differ for different categories of adapters.
- Click Add Connection.
A Connection dialog box opens. - Enter the connection parameters.
See the information specific for your adapter in the Adapter Administration technical content. - Click Test, if available, to test your connection.
- Click Configure.
The added connection appears under its configured adapter in the Get Data dialog box.
Procedure: How to Change a Connection
- From the Get Data dialog box, under Server Datasources, right-click a connection.
A shortcut menu opens. - Click Properties.
A Connection dialog box opens. - Change the connection parameters.
See the information specific for your adapter in the Adapter Administration technical content.
- Click Test, if available, to test your connection.
- Click Configure.
The changed connection appears under its configured adapter in the Get Data dialog box.
- Release: 8207
- Category: Accessing Data
- Product: WebFOCUS Home Page
- Tags: How-to's