Using the Repository Distribution Option
When distributing scheduled output to Repository in the Basic Scheduling tool, specify the Repository folder location to which to distribute the report output.
Note: You must be authorized to distribute to the Repository in order to create a schedule that uses Repository distribution. You must also be authorized to distribute content to your selected folder.
The best practice for recurring and burst schedules is to create and specify a different folder location for each report being distributed for the same report procedure (FEX). This is important so the security access can be defined and managed at the folder level and when opting to burst the distributed report output because the burst value is assigned as the title value to each report section that is distributed. The title value is the value that displays in the Resources tree.
When the report output is distributed using the Repository distribution option, the Day, Date, and Time information is prepended to the Save Report As value specified in the schedule task information. For example, the Schedule for the Product Packaging & Price report is assigned the default Save Report As value 'Product_Packaging_Price.htm' (blanks and special characters are replaced with an underscore character).
The report output distributed to Managed Reporting on Monday December 19, 2011 at 1:35pm EST is assigned the description: Mon, 19 Dec 2011 01:35 PM EST Product Packaging Price.
Procedure: How to Use the Repository Distribution Option
- Right-click a report procedure (FEX), select Schedule, and then select Repository.
The Basic Scheduling tool displays in a new window.
- Enter or verify task information.
- Click the Distribution tab.
The Distribution Server adds Day, Date, and Time to the beginning of the Save Report As value specified in the Task tab.
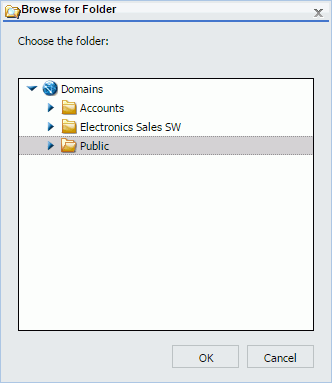
Verify that the folder location is the folder to which you want to distribute the report output. The folder location defaults to the same folder as the report procedure (FEX) being scheduled. Users can select a different folder to distribute the report output to by clicking the Folder Location button, which will display a dialog box of the Resources tree from which a folder location can be selected, as shown in the following image.
Note: You must also be authorized to distribute content to your selected folder.
- Optionally, select the Do not add a timestamp to the filename check box if you want the report output to be overwritten with each distribution.
- Select the Notification tab to specify whether to send an email notification of the schedule job status. If you select Always or On Error, then you must specify the Reply Address, Subject, Brief Message To, and Full Message To.
- Select the Properties tab to specify the Title, Priority, whether to delete the schedule if it will not run again, and whether the schedule is enabled to run.
- Select the Recurrence tab to specify how often to run the schedule. If you want the schedule to run on the current day, set the Start Date and Start Time to values later than the current time.
- Select Save & Close to save your changes.
- Release: 8205
- Category: Scheduling and Distributing Content
- Product: ReportCaster