Uploading Data Files
You can upload delimited, Excel, JSON, or XML files into WebFOCUS, where you can preview and modify the data before loading it to a database, then create visualizations or prepare it for future analysis.
Procedure: How to Upload Data Files
-
On the WebFOCUS start page, click the plus menu, and then click Get Data, or, on the WebFOCUS home page, click the Get Data button
 .
.The Get Data dialog box opens, as shown in the following image.
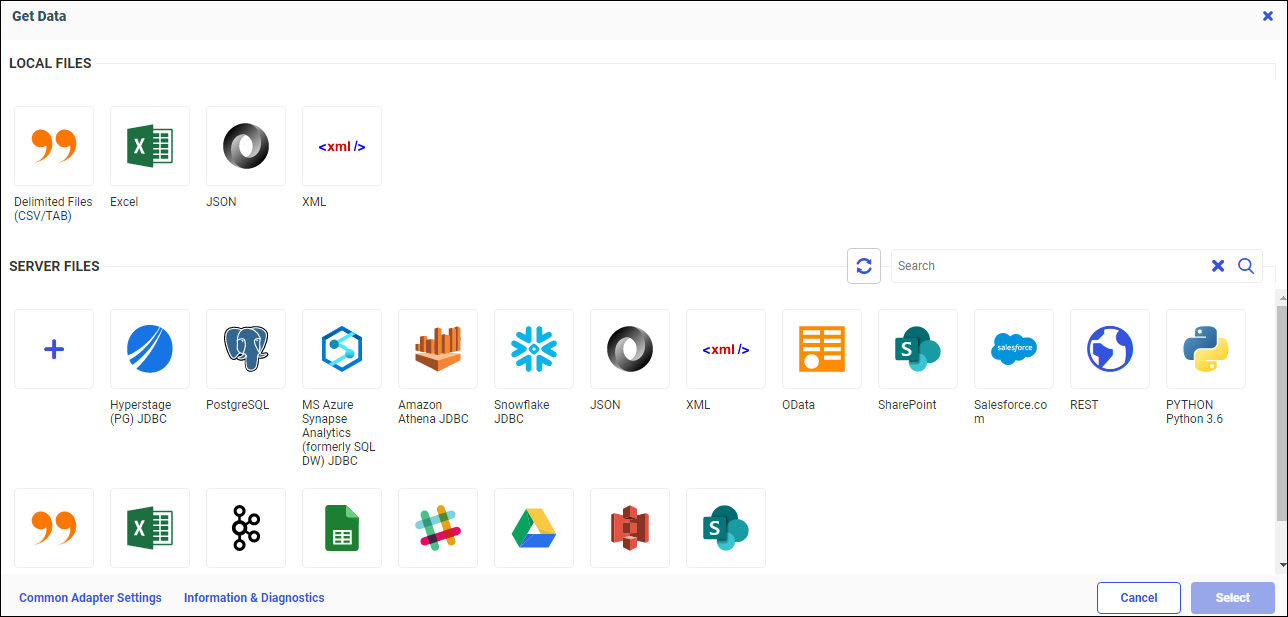
-
Under Local Files, click your upload file type. You can select from the following file types: Delimited Files, Excel, JSON, or XML. An Excel file can contain a single worksheet or multiple worksheets. Delimited, JSON, and XML files are individual data sources.
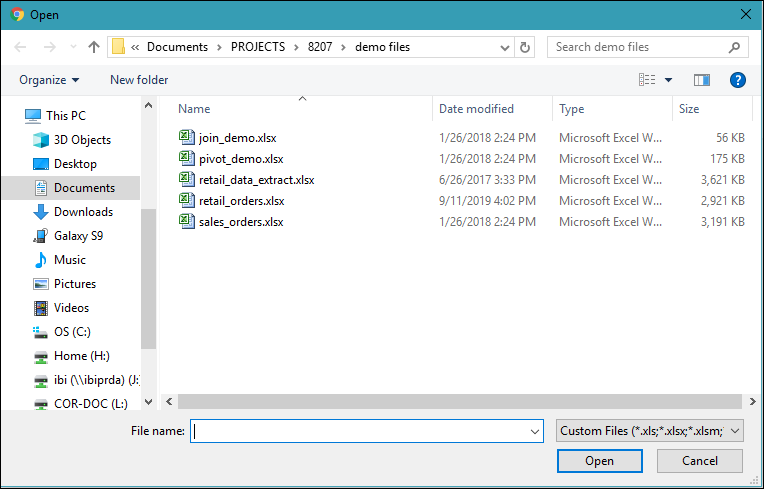
Your Open dialog box displays, as shown in the following image.
-
In the Open dialog box for your operating system, select the file that you want to upload, and then click Open.
This opens a preview, as shown in the following image. In this example, we are showing a multi-worksheet Excel file.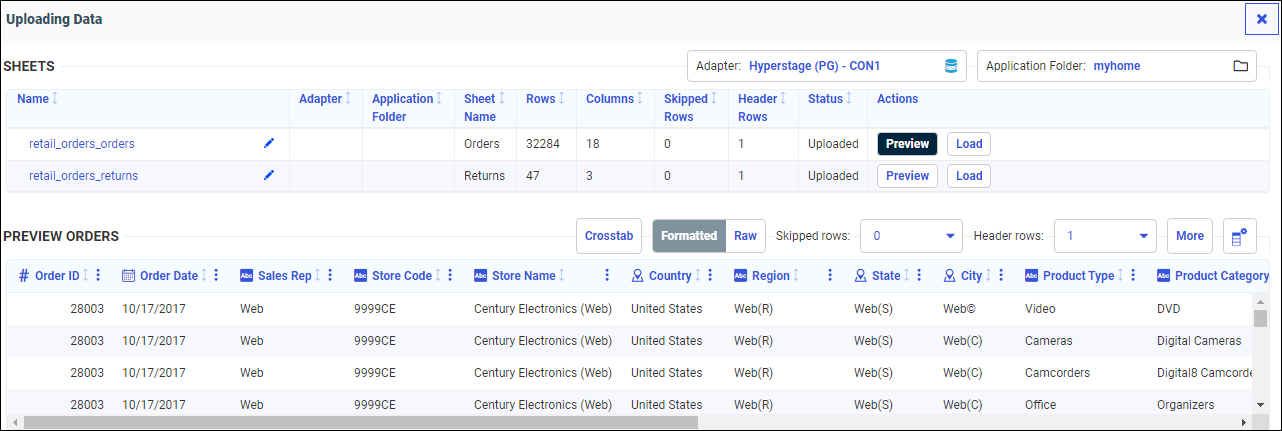
Your file will be loaded to the default datastore of the displayed Adapter. You can click the Adapter name to select an adapter folder and connection where your data is loaded. For more information see Changing a Target Connection When Uploading Files.
You can click the Application Folder name to select an application folder and specify where your synonym is created. For more information see Changing a Target Application When Uploading Files.
You can change the name of your worksheet by clicking inside the Name field and typing a new name. From the Actions column, click the Preview or Hide buttons to control the preview of sample data.
You can select individual worksheets to preview or load. A single-sheet Excel file, or the first worksheet of a multi-sheet Excel file, is automatically previewed.
You can modify your data, such as changing the number of skipped rows or header rows, displaying your data as formatted or raw, or choosing from more advanced and customized file options.
Uploaded Excel worksheets are examined for leading rows that contain titles or other extraneous information before the header rows and data values. These leading rows are automatically skipped. The number of rows to be skipped is displayed in the Skipped Rows field, and can be changed.
Note: If uploading a CSV or other delimited file, the data preview toolbar displays a Missing Value field. The characters in this field indicate a missing value in your data source, for example: "NULL". To see the Missing Value field when uploading an Excel file, click the More button, and then expand the Advanced group.
You can click the Choose Columns icon to select which columns you want to load to the target database or data store. For more information see Choosing Columns to Load When Uploading Files.
Column drop-down menu options let you change geographic roles and data types, or rename columns.
Numeric fields are generally classified as measures. If the name of a numeric field implies that it is more likely to be a dimension instead of a measure, it is classified as a dimension by default. For example, fields ending with _ID such as ORDER_ID are classified as dimensions. This allows you to create content that more accurately represents your data.
To change field classifications from dimensions to measures, select Convert to measure from the column drop-down menu.
To change field classifications from measures to dimensions, select Convert to dimension.
-
Click the Load button next to the worksheet you want to load.
Your worksheet loads, and its load status is updated, as shown in the following image.
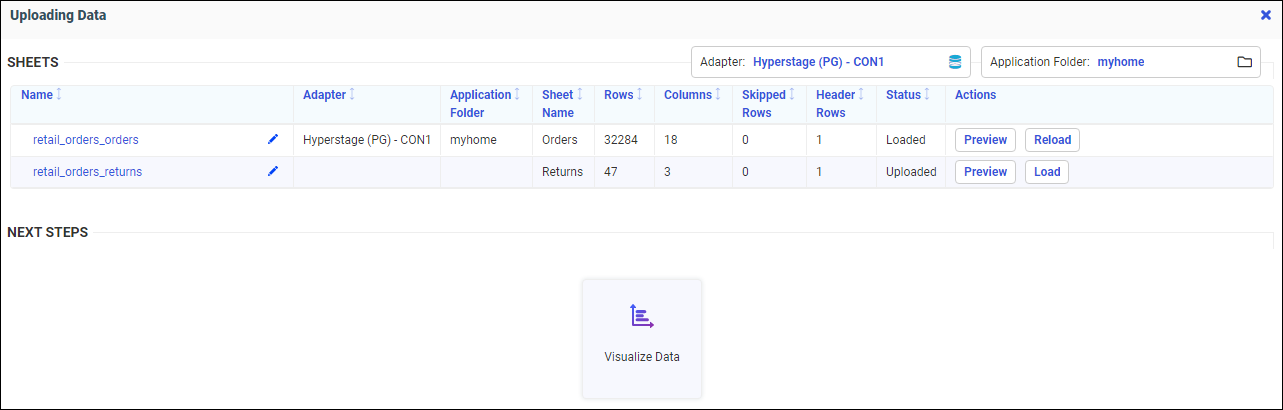
You can still make changes to your worksheet after it is initially loaded, and then click the Reload button to load your changes. Once your file is loaded, you can create your own visualizations, by clicking Visualize Data.
- Release: 8207
- Category: Accessing Data
- Product: WebFOCUS Home Page